Steps to Create and Use Forms in DotcomPal
1. Open the Marketing Section
From the left vertical menu, click on Marketing and then select Forms.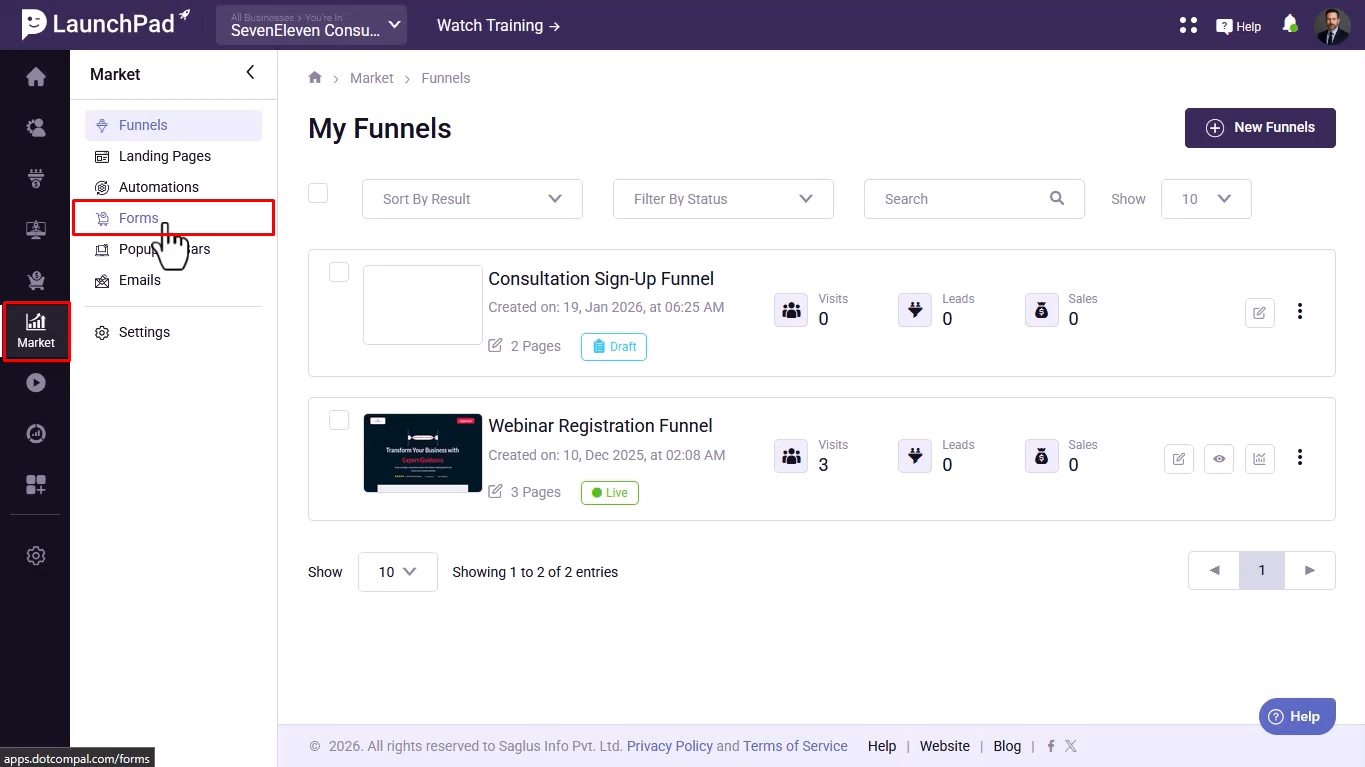
2. Create a New Form
Click on the Create Form button.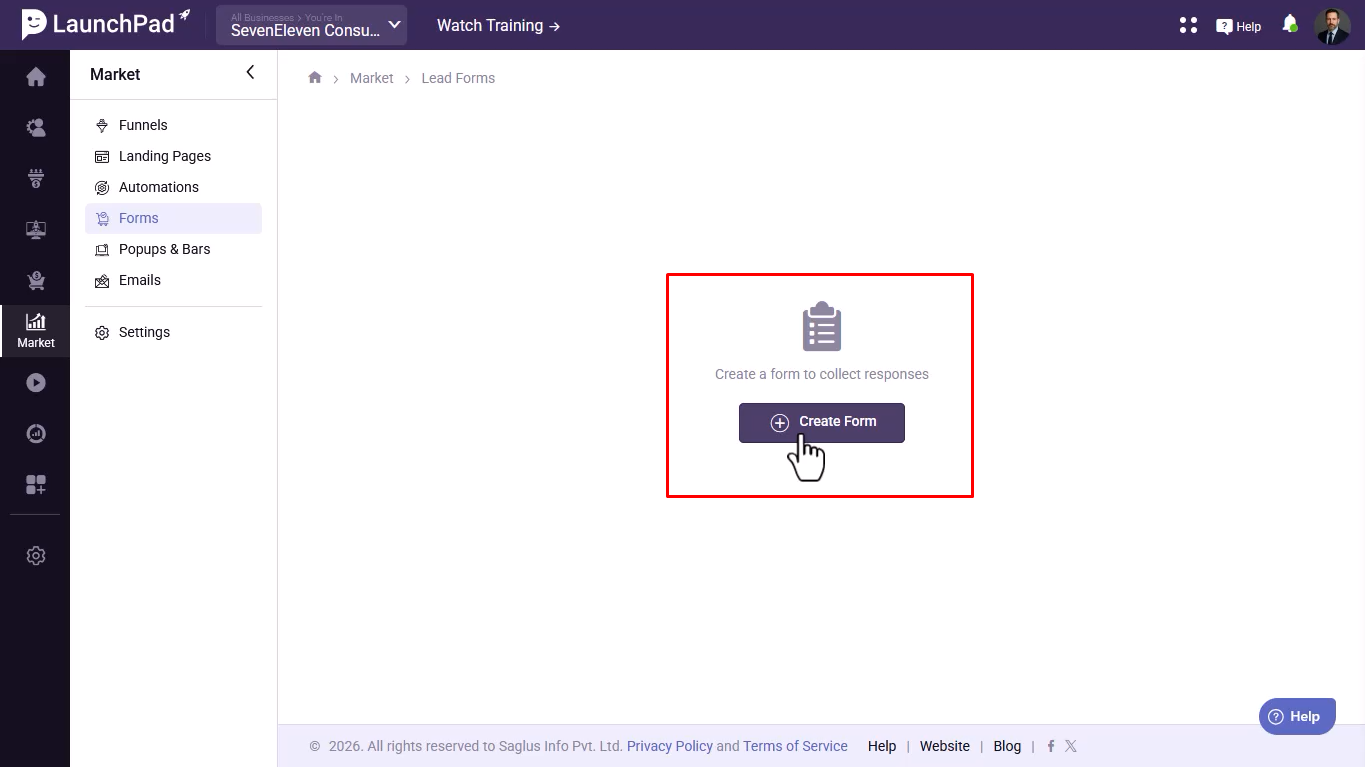
3. Choose a Form Template
Select from pre-built Lead Forms or Sign-Up Forms templates, or choose Create From Scratch.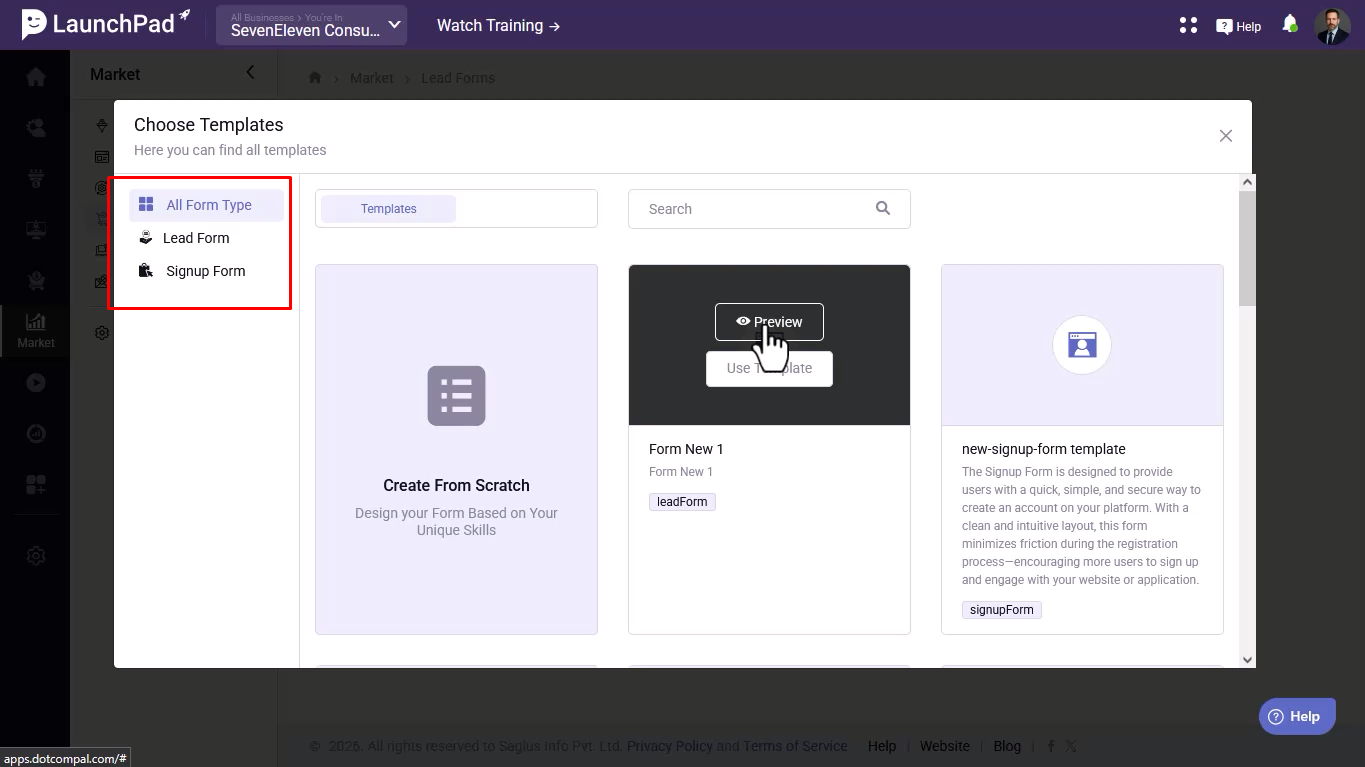
4. Understand the Form Builder Sections
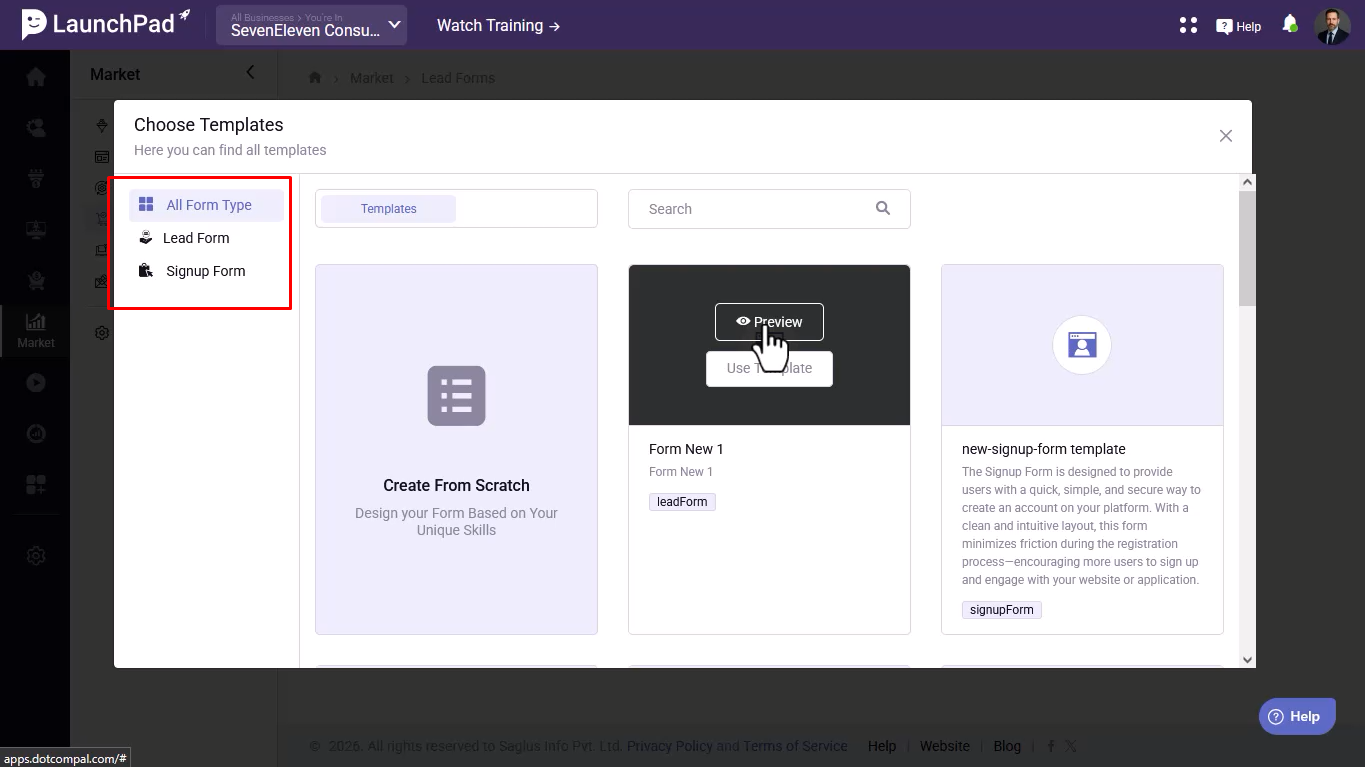
The form builder contains four sections:
- Builder
- Conditions
- Automations
- Thank You
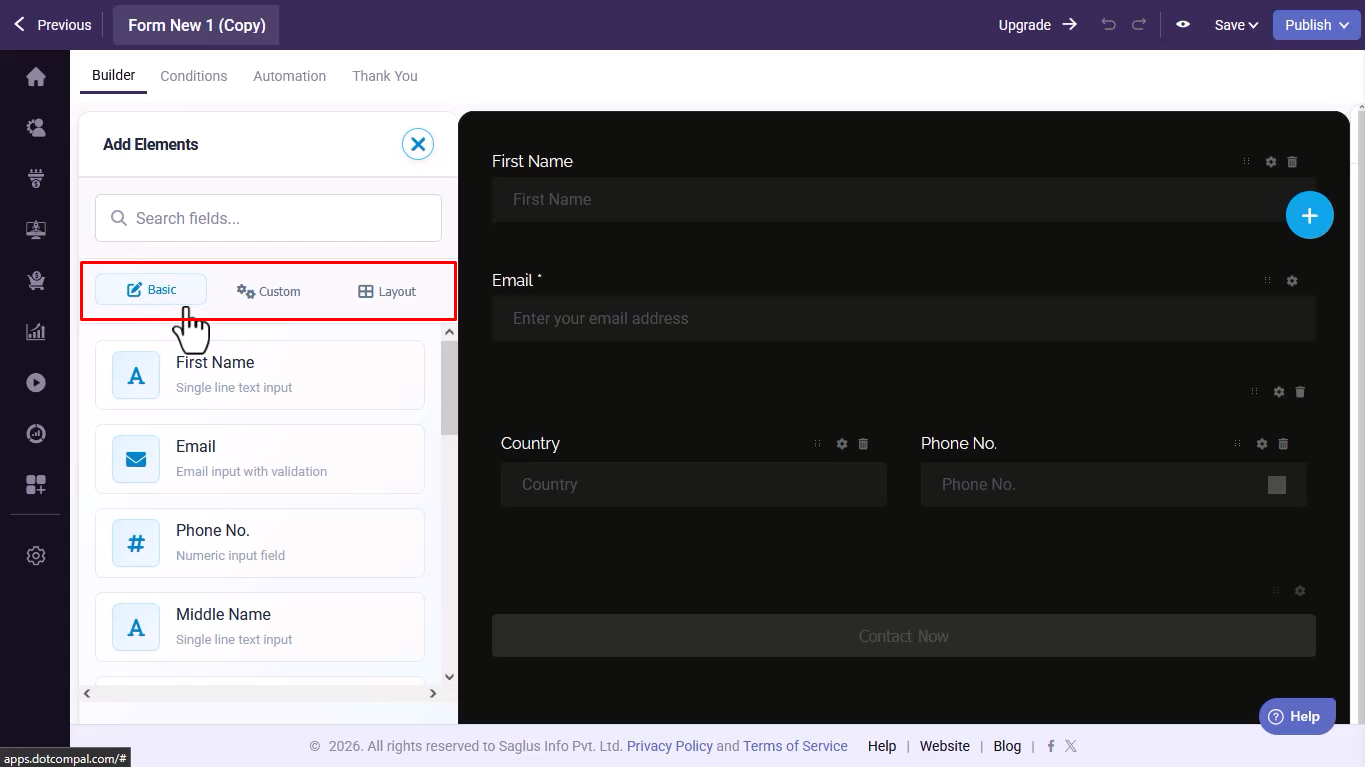
5. Add Form Elements
Use the left plus (+) icon to add fields and elements.
- Basic
- Custom
- Layout
6. Use Drag and Drop Layouts
Drag and drop layout structures to organize your form fields properly.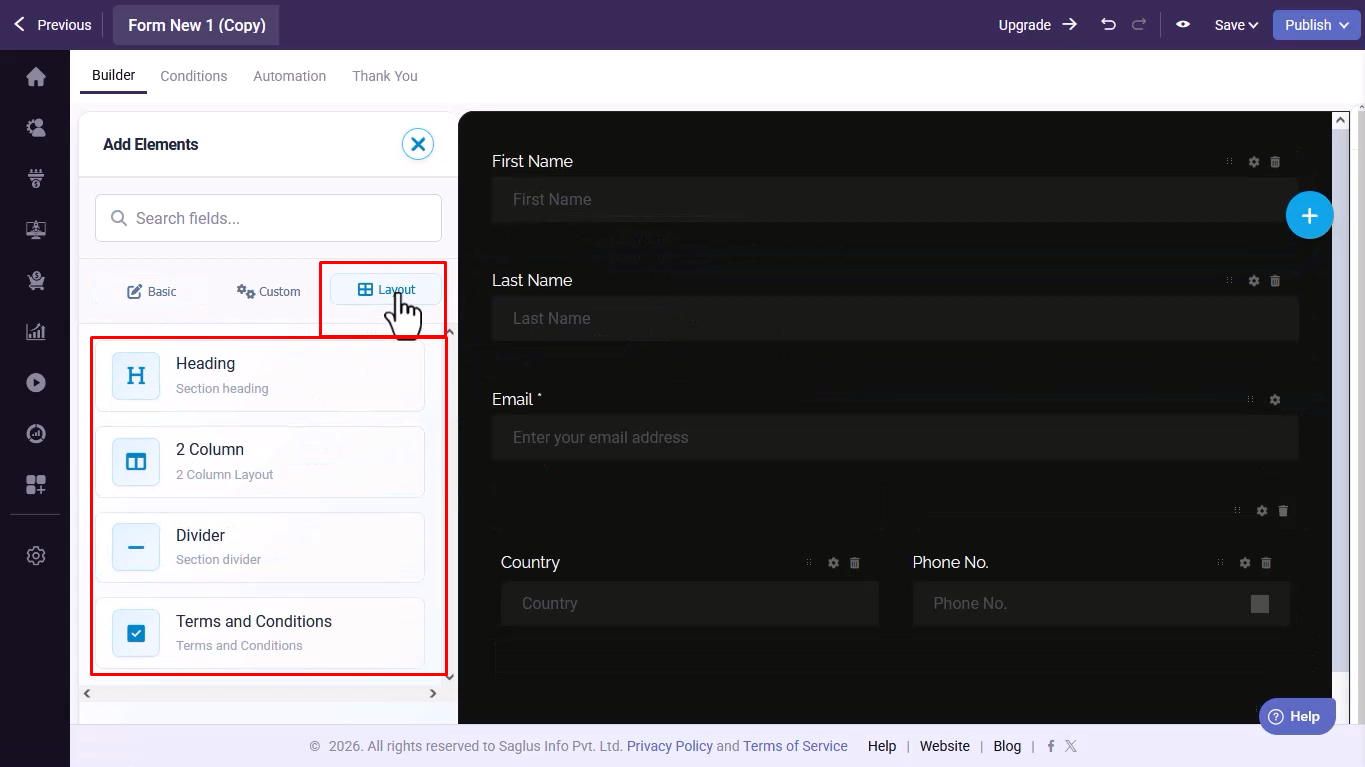
7. Customize Form Design
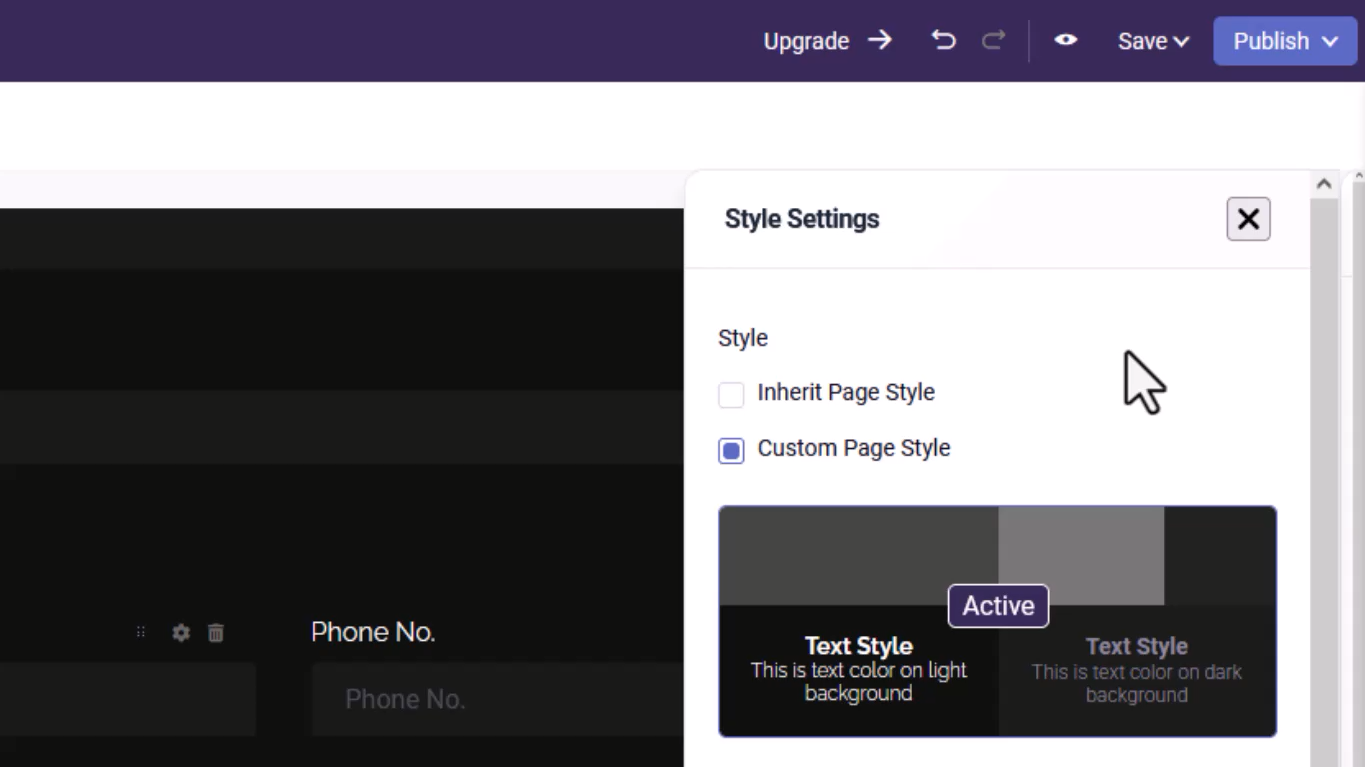
Click the right plus (+) icon to open styling options.
- Inherit Page Style – matches the page design automatically.
- Custom Page Style – fully customize the form appearance.
8. Set Form Conditions
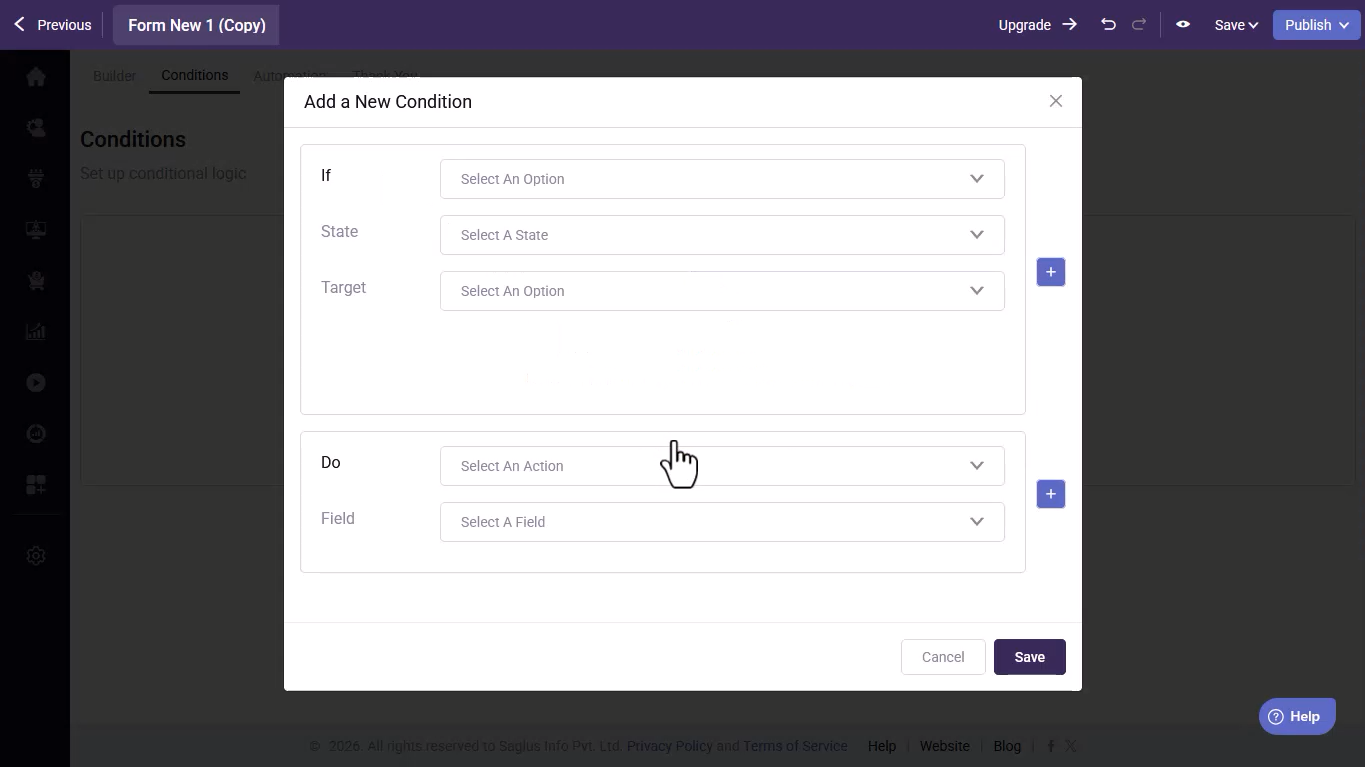
Go to the Conditions tab and click New Condition.
- IF → First Name
- State → Contains
- Value → Last Name
- DO → Disable
- Field → Last Name
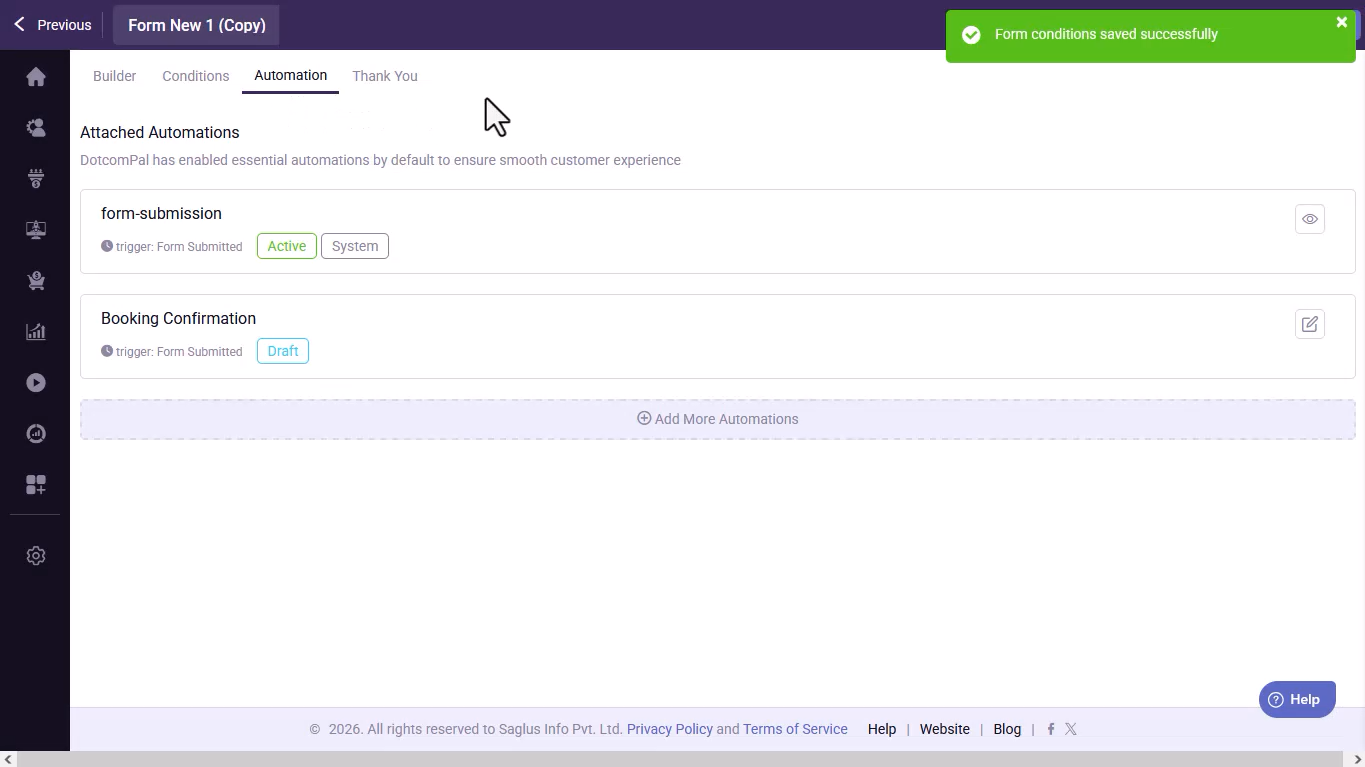
9. Configure Automations
In the Automations tab, configure actions like:
- Tagging leads
- Sending emails
- Triggering workflows
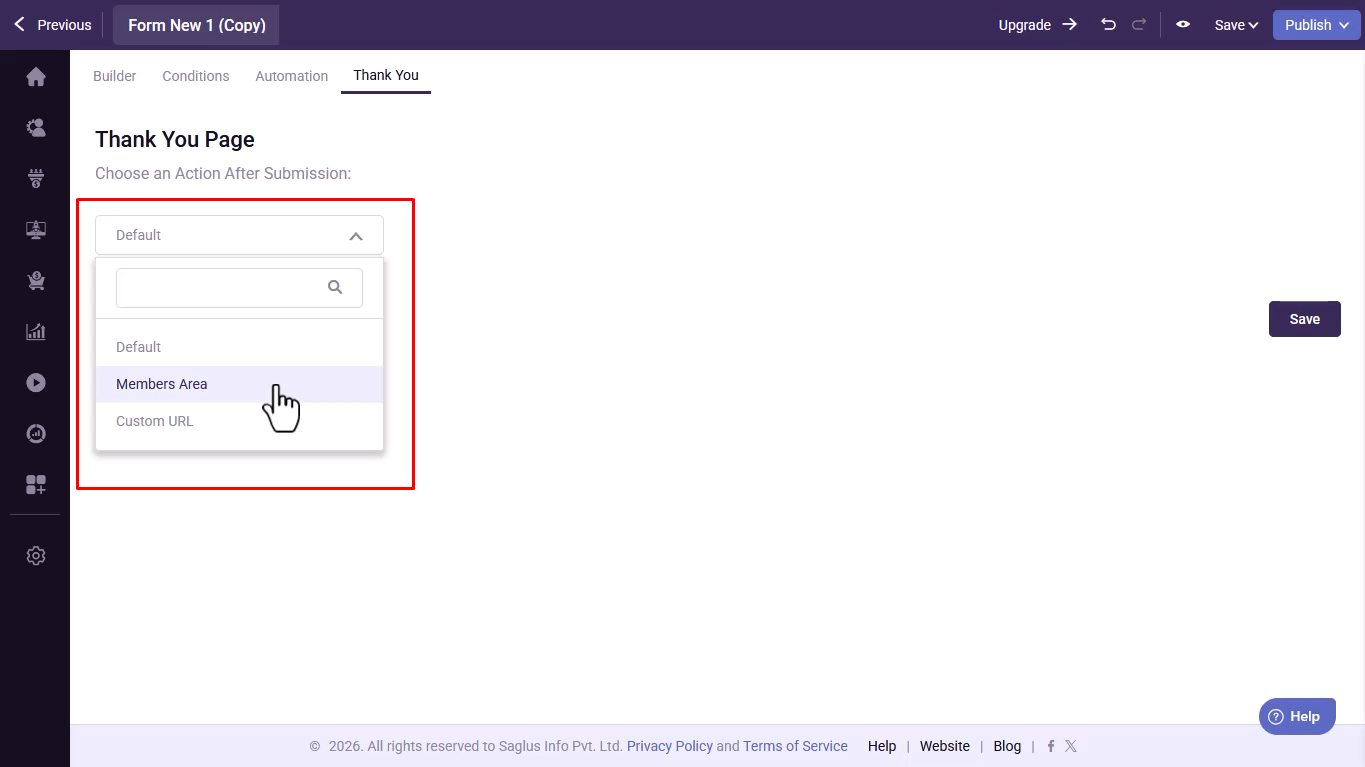
10. Configure Thank You Settings
In the Thank You tab, choose one of the following:
- Members Area – redirects users to members area.
- Custom URL – redirects users to any URL of your choice.
11. Save and Publish the Form
Click Save and then Publish your form.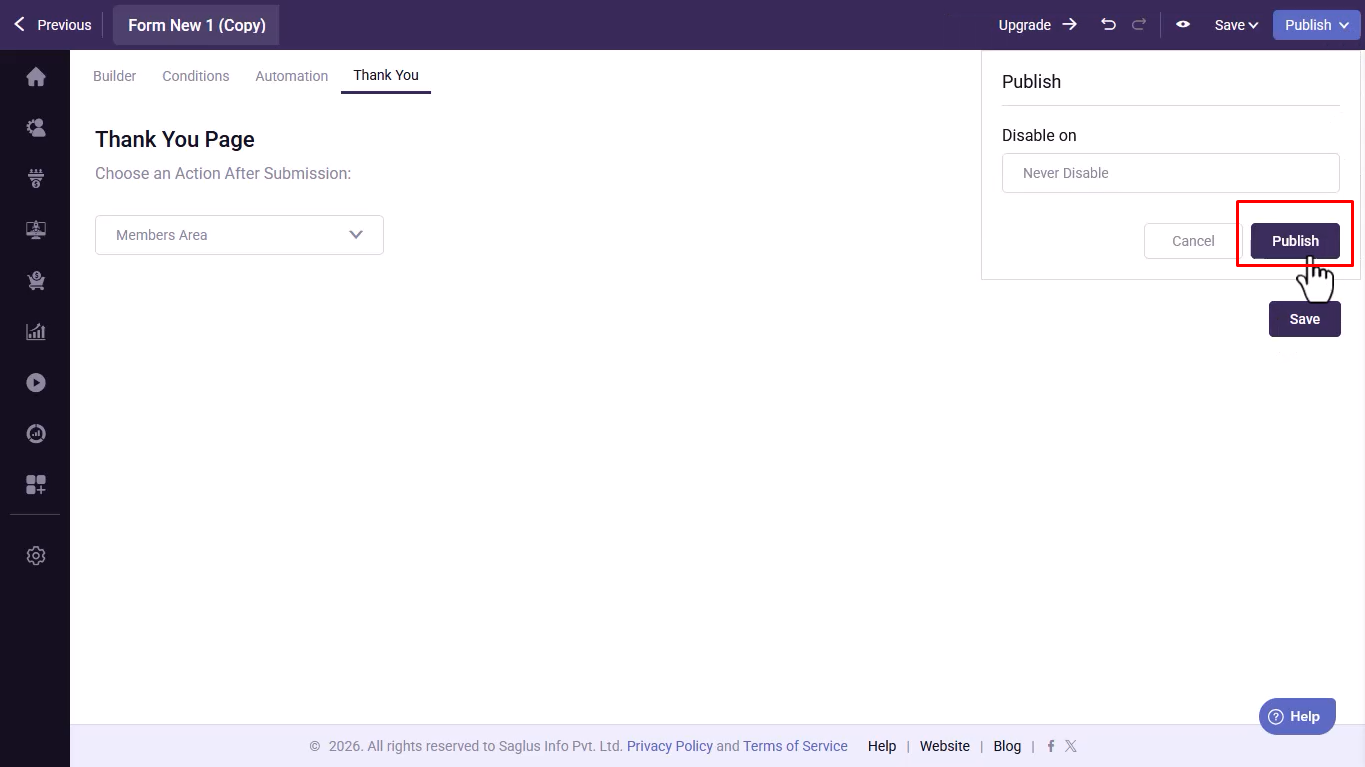
12. Add the Form to Funnel or Landing Page
Open your Sales Funnel or Landing Page and click on Elements.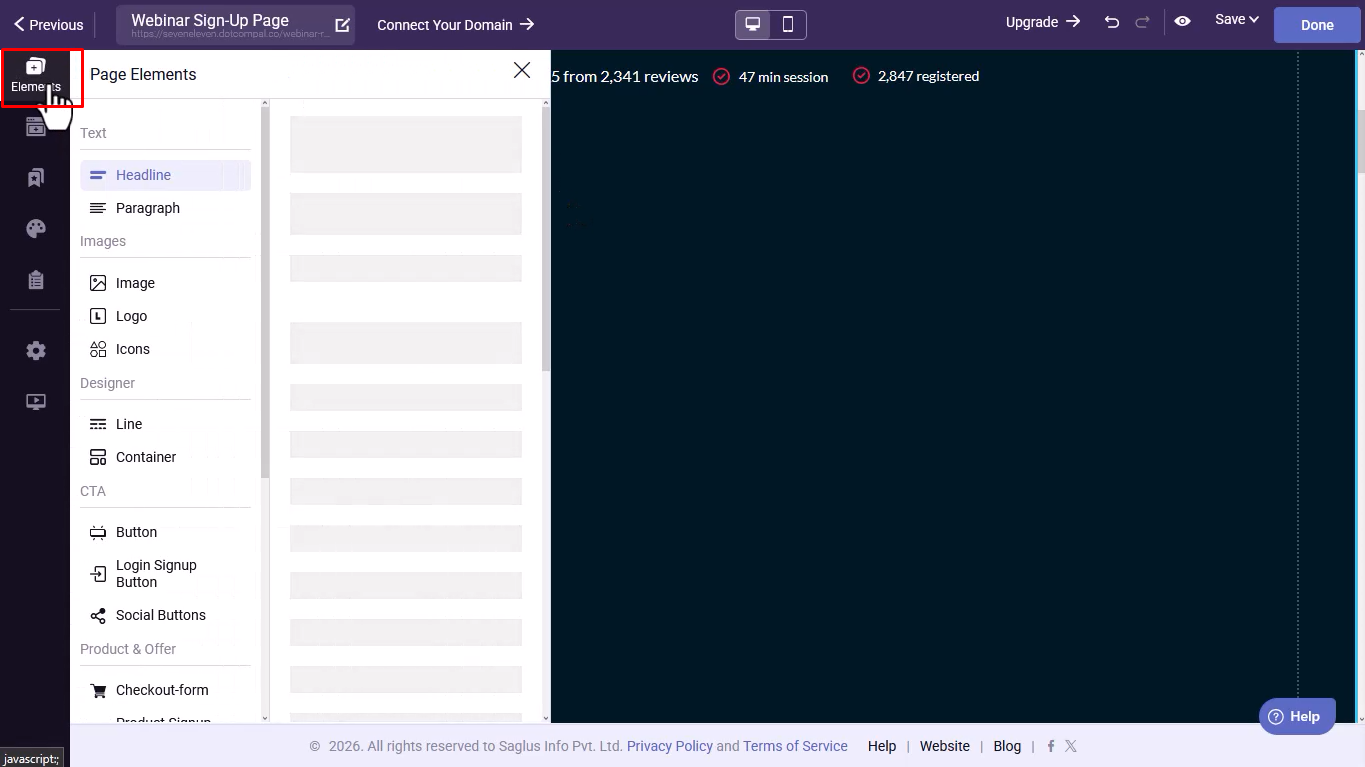
13. Insert the Lead Form Element
Scroll down to the Form section and locate the Lead Form element.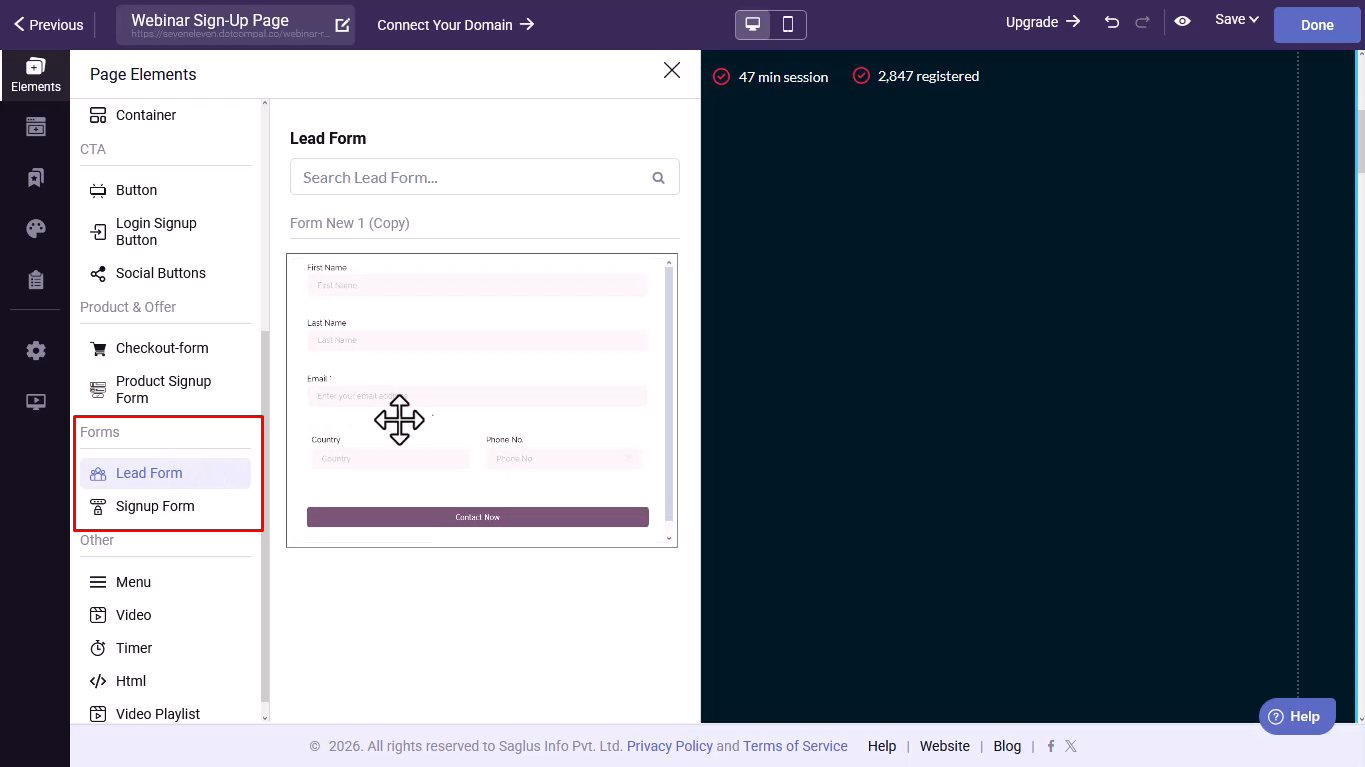
14. Drag and Drop the Published Form
Drag the form into your funnel or landing page.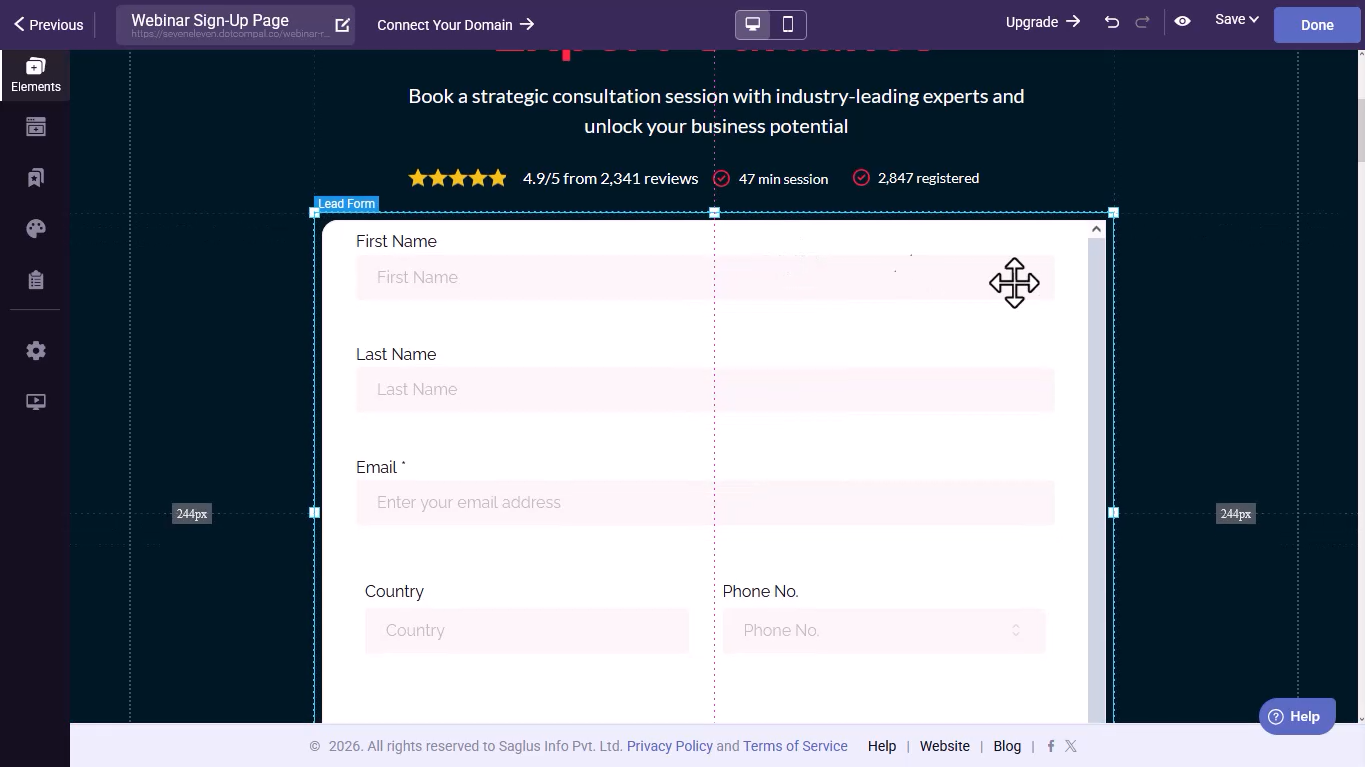
15. Form is Ready to Use
Your form is now live and ready to capture leads.
Was this article helpful?
That’s Great!
Thank you for your feedback
Sorry! We couldn't be helpful
Thank you for your feedback
Feedback sent
We appreciate your effort and will try to fix the article